This tutorial walks through the process of uploading a data file containing location information into AudienceMaker.
The AudienceMaker platform makes it possible to upload location information so you are easily able to evaluate an audience based on proximity to a location
Step 1
Prior to upload, users will need to verify that the file intended for upload meets the following criteria:
- The file is in a comma separated value (.csv) format
- The header record does not contain any special characters
- The file must contain all required data elements for upload including site name, address, city, state, and zip code
- AudienceMaker has a number of generic icons for location types, if a customer icon is needed, please contact Customer Success
Important note: When you upload a list of locations, each location must have a unique site name.
To streamline the upload process, the following file layout with corresponding field names may be applied to assist the platform in analyzing and mapping pertinent fields:
| Field Name | Field Description | Field # | Field Type | Notes / Reference |
| ‘name’ | Site Name | 1 | Alpha | |
| ‘addr1’ | Address Line 1 | 2 | Alpha | |
| ‘addr2’ | Address Line 2 | 3 | Alpha | Optional |
| ‘city’ | City | 4 | Alpha | |
| ‘state’ | State | 5 | Alpha | |
| ‘zip’ | ZipCode | 6 | Alpha | Both 5-digit and 9-digit (zip+4) accepted |
Step 2
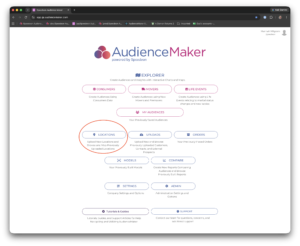
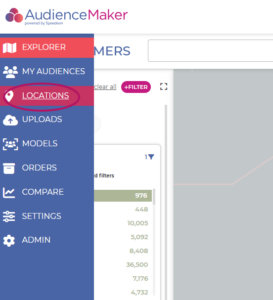
Once upload criteria has been verified, click the ‘LOCATIONS’ button on the AudienceMaker home screen OR the ‘LOCATIONS’ shortcut within the AudienceMaker toolbar to access the upload screen within AudienceMaker.
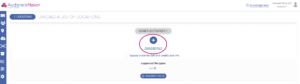
You may drag and drop your file into the file uploader box on the upload screen OR choose a file to upload by clicking the “+” symbol within the dotted line area:
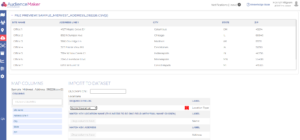
Once a file has been designated for upload, AudienceMaker will ingest the file and analyze it to ensure that it meets the necessary requirements. Note that depending on file size, it may take several minutes for the file to be ingested. When the file has been ingested the ‘IMPORT DATASET’ screen will appear:
Step 3
AudienceMaker will attempt to map fields to the corresponding contact details (site name, address, etc.) however, some mapping may need to be completed by the User to finalize the file for enrichment. If this is required, drag and drop the column to the corresponding data type area and use the drop downs to configure the field for AudienceMaker.
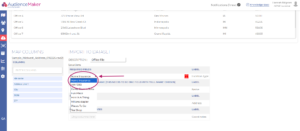
Additionally, users will need to select a ‘Location Type’ which corresponds to the name and icon that will appear in the map legend as well as within the map once the locations import has been complete.
You may also contact your designated Customer Success Manager or the Customer Success team (audiencemaker@speedeondata.com) if no location type corresponds to the type of locations you’re attempting to upload OR if you’d like to a custom icon/name.
Step 4
Once all field mapping has been made and verified, enter a description for the upload and select the location type. Once this criteria has been selected click the blue ‘IMPORT’ button in the lower right-hand corner of the screen:
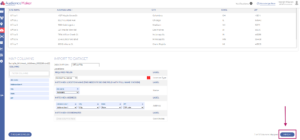
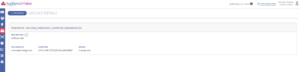
Upon import, an “Upload Details” screen will appear and within a few minutes you should receive an email notification that your location file has been uploaded successfully. This email is just to signify that your upload file has been ingested. At this point, the backend build process will now begin and your locations will be available to use once that is complete.
Step 5
The backend location build process will automatically process these locations and send you an email when they are ready to use in each explorer, Consumers, Movers, and Life Events. This will generally be within an hour.
Step 6
Once the build process has been completed you will receive an email notifying you that the process is complete. You will receive a separate email when the build process is completed for Consumers, New Movers, and Life Events.
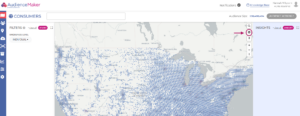
You will be able to utilize your locations by navigating to the ‘EXPLORER’ page and clicking on the ‘LAYERS’ icon. Uploaded location types will be visible there. Check the box next to the location type you are looking for and the location widget will automatically populate:
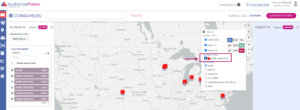
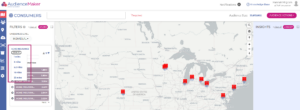
You can now toggle between the available radius to further refine your audience:
Step 7
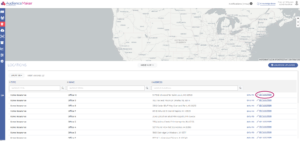
Once locations are imported, it’s possible to manipulate and edit the radius by site/location. This can be accomplished by navigating to ‘LOCATIONS’ and selecting a one site / location listed in the lower portion of the screen:
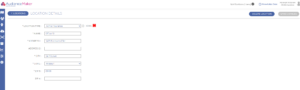
Select ‘EDIT LOCATION’ to:
– Delete the location from the map (click the blue ‘DELETE LOCATION’ button to remove the location)
OR
– Change the ‘LOCATION TYPE’ icon, name, address components or default radius.
In the site / locations listed, you may also elect ‘FLY TO’ to zoom the map in the upper portion of the screen to that specific site.