This tutorial walks through the process of validating and scoring a model within the AudienceMaker platform.
Important Note – This tutorial provides an overview of the model validation and scoring process AFTER a model has been built. If you have not yet built a model, please reference the AudienceMaker tutorial on Building a Model.
Step 1
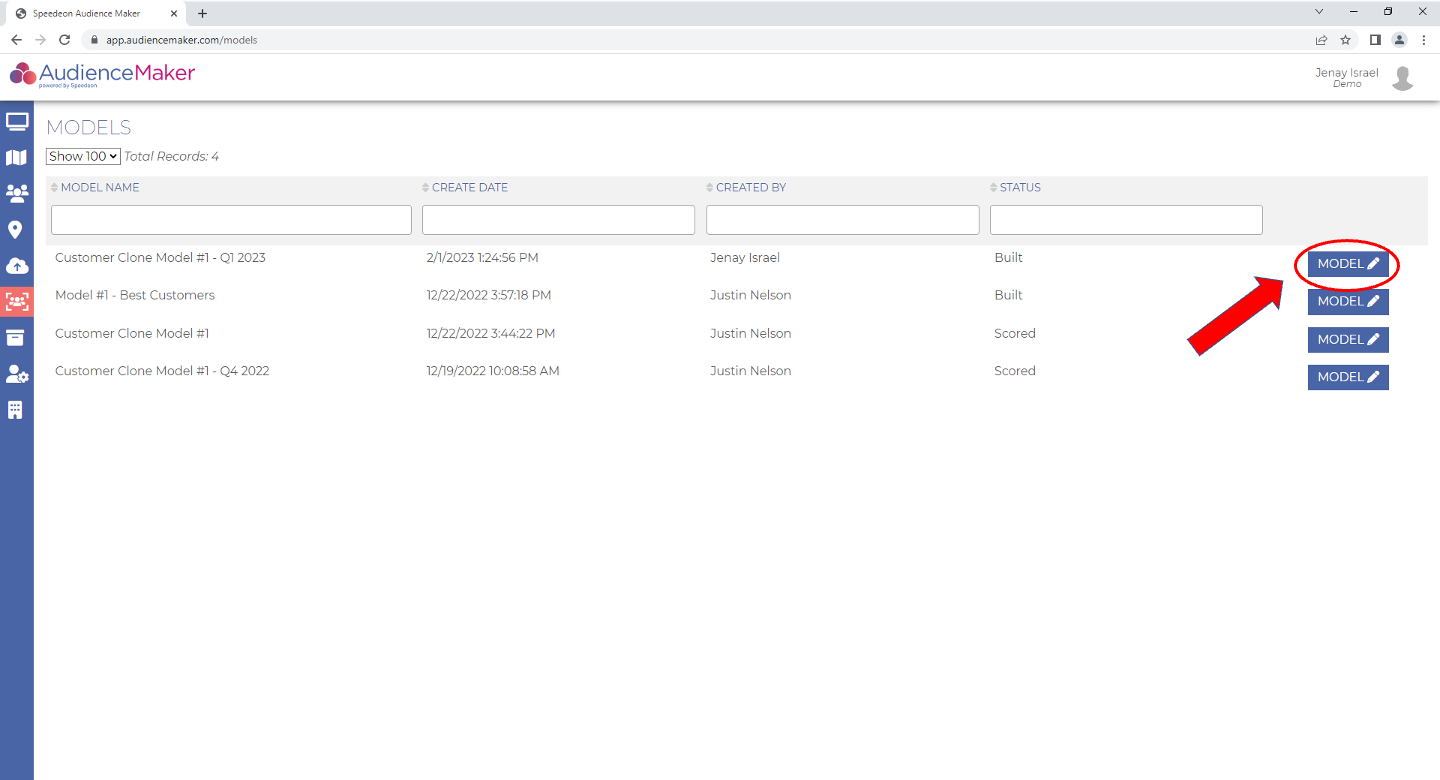
After you’ve built a model in the AudienceMaker platform, navigate to the ‘MODELS’ button on the home screen OR the ‘MODELS’ shortcut within the AudienceMaker toolbar within AudienceMaker. Identify the model that you built by name, creation date, creator or status. Once you’ve located your model, click the blue ‘MODEL’ button to review model metrics:
The model validation process includes reviewing model details to verify that the model was built correctly and may be leveraged to support activation and analytic initiatives. The ‘TRAINING DATA’ panel on the right of the screen provides high-level detail that may be referenced for auditing the model:
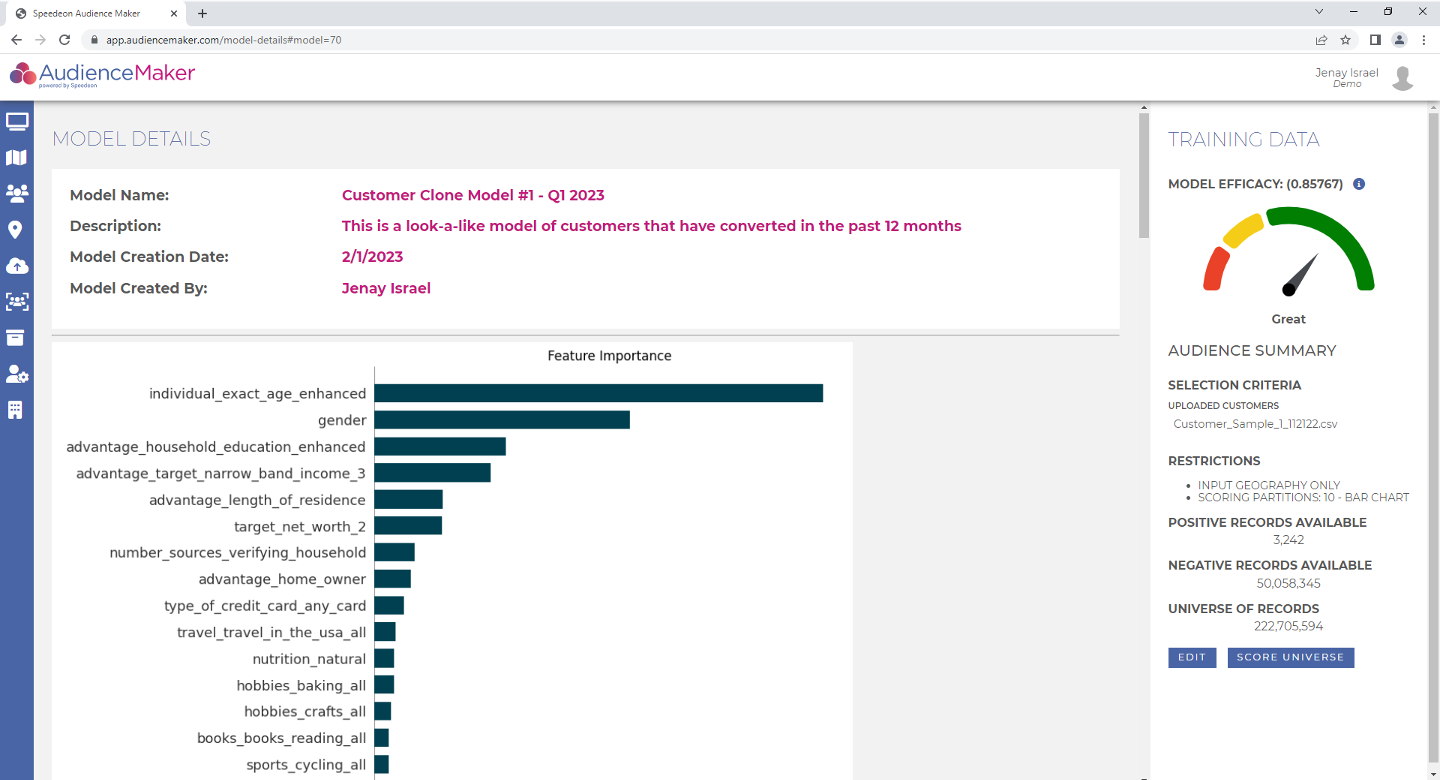
‘TRAINING DATA’ outlines details supporting model development. When validating a model, review and verify the following:
‘MODEL EFFICACY’ is the same metric as the ‘Area Under Curve’ displayed in the ‘ROC Curve’ plot under ‘MODEL DETAILS’. MODEL EFFICACY is derived from analyzing the model’s ability to differentiate the true positive rate from the false positive rate within the model testing set. The measure should fall between .60 – .95 for a “workable” model. Models below .60 have a difficult time differentiating between positive and negative records and models greater than .95 may be overly biased and may need to be re-built. IF model efficacy is outside of an acceptable range, consider re-building the model with alternative selection criteria.
‘AUDIENCE SUMMARY’
- ‘SELECTION CRITERIA’ – Documents the audience that was used as the ‘target’ in model development
- ‘RESTRICTIONS’ – Documents any geographic restrictions as well as the number of scoring partitions
- ‘POSTIVE RECORDS AVAILABLE’ – The count of ‘target’ records used for model development
- ‘NEGATIVE RECORDS AVAILABLE’ – The count of ‘non-target’ records used for model development
- ‘UNIVERSE OF RECORDS’ – Total available count of consumer records available for model scoring
Once ‘TRAINING DATA’ has been reviewed and verified, review the following model metrics to ensure they support the narrative surrounding model development:
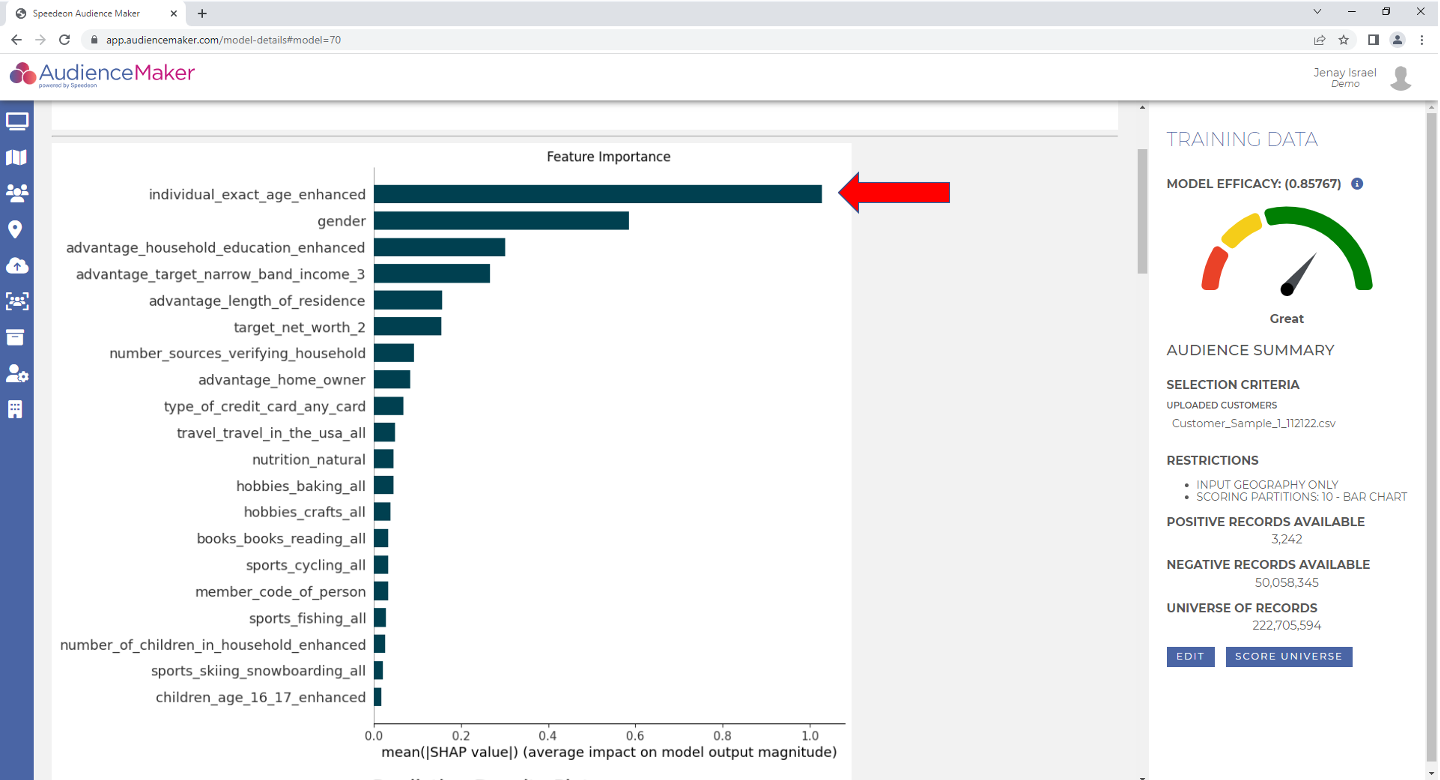
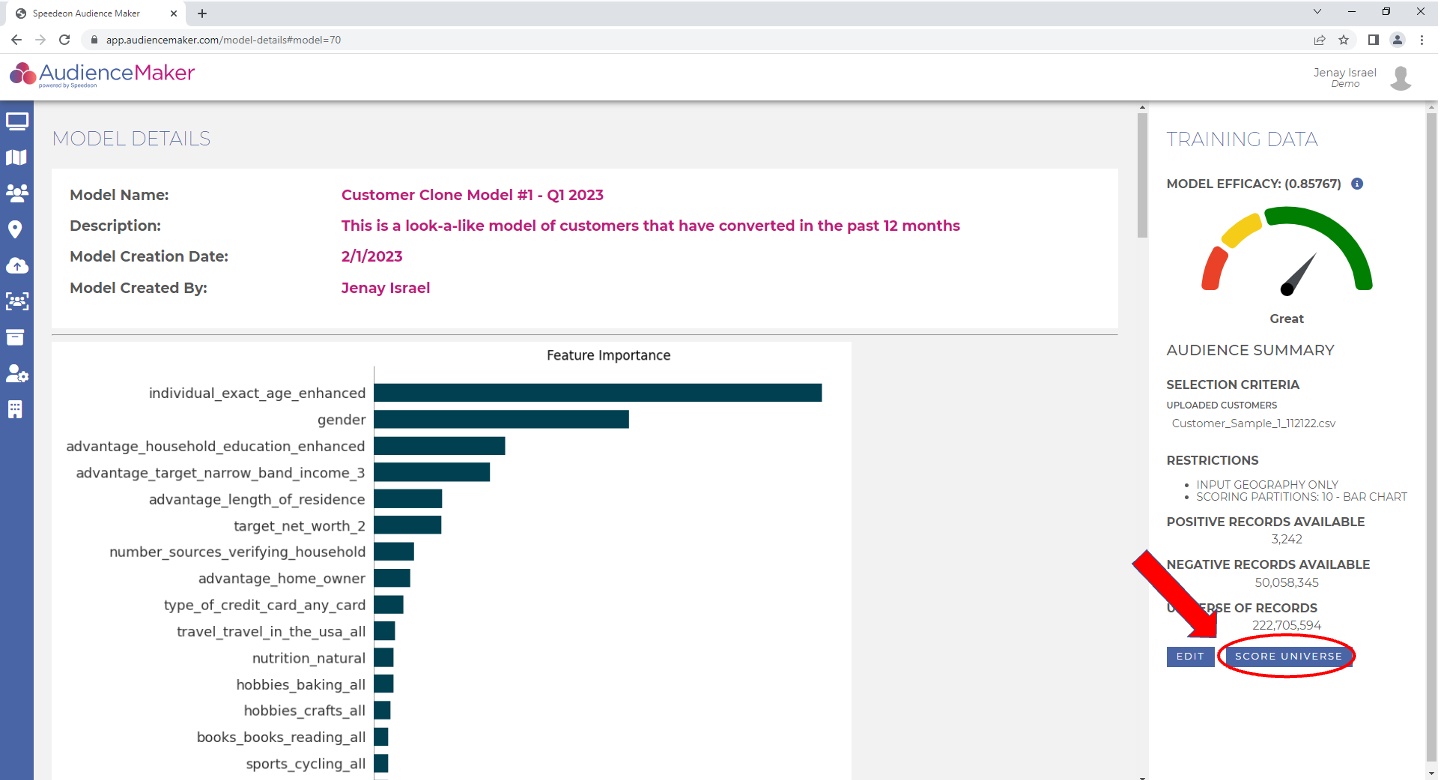
‘Feature Importance’ – This chart documents the 20 most impactful attributes utilized by the model according to SHAP value, a measure used to help explain features within the model. The corresponding bar next to each attribute name represents the amount of impact the attribute had in model development, or SHAP value. In the table below, ‘individual_exact_age_enhanced’ is the feature with the greatest weight of importance within the model, followed by ‘gender’ and ‘advantage_target_narrow_band_income_3’.
‘Prediction Density Plot’ – This plot measures the distribution of model score for the model test set for both the “target” group as well as the “non-target” group. Graphically, the plot details the model’s ability to identify positive records from negative ones. Meaningful differentiation between target & non-target groups validate the model’s ability to distinguish the ‘Target = 1’ (good) from the ‘Target = 0’ (bad).

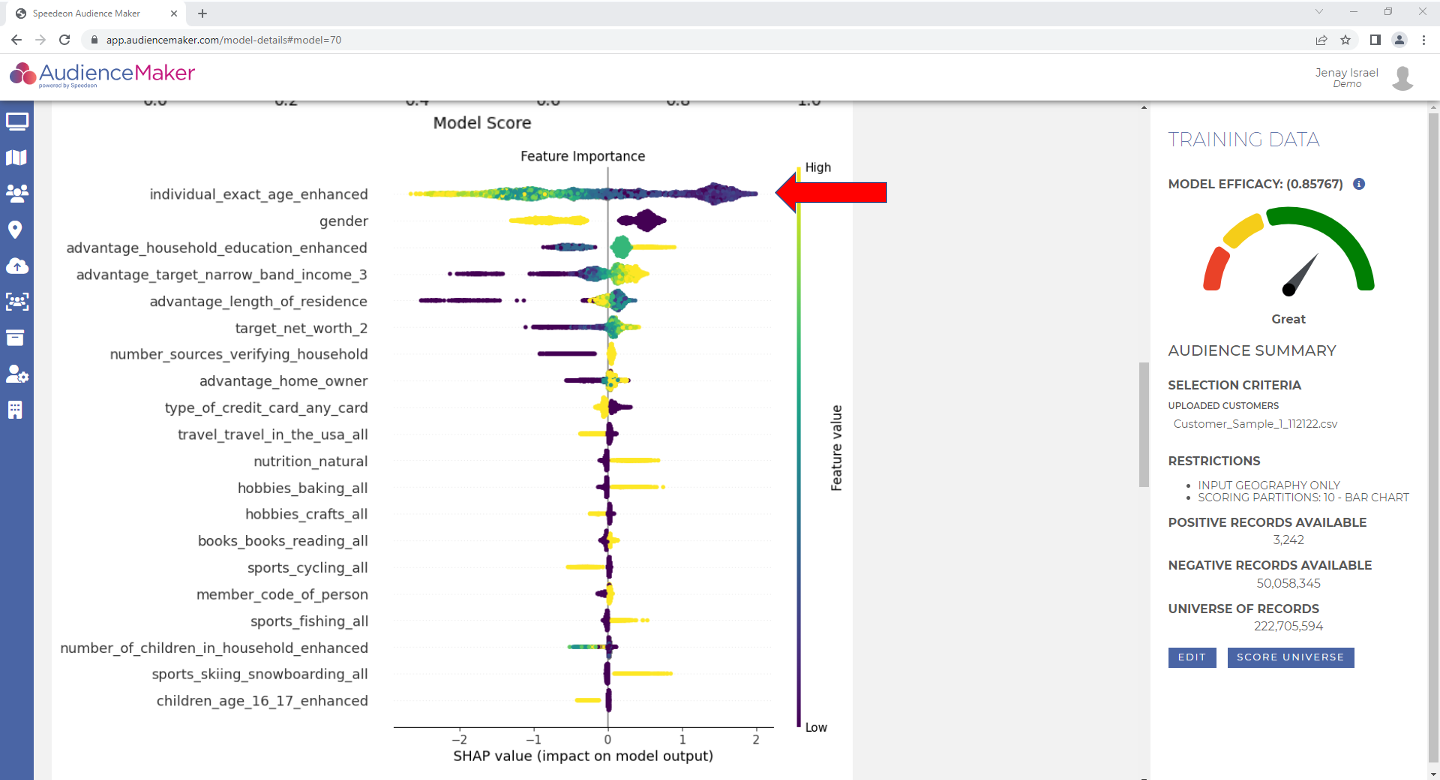
‘Feature Importance’ with Attribute Values – This “beeswarm” chart is like the first ‘Feature Importance’ chart in that it indicates ranking attributes of importance within the model. The difference is that this chart also details how the attribute values impact model score specifically. For example, in the lower values of ‘individual_exact_age_enahanced’, denoted by purple, (i.e. lower ages) have a favorable impact on model score whereas higher values, denoted in yellow, (i.e. higher ages) are unfavorable in the model.
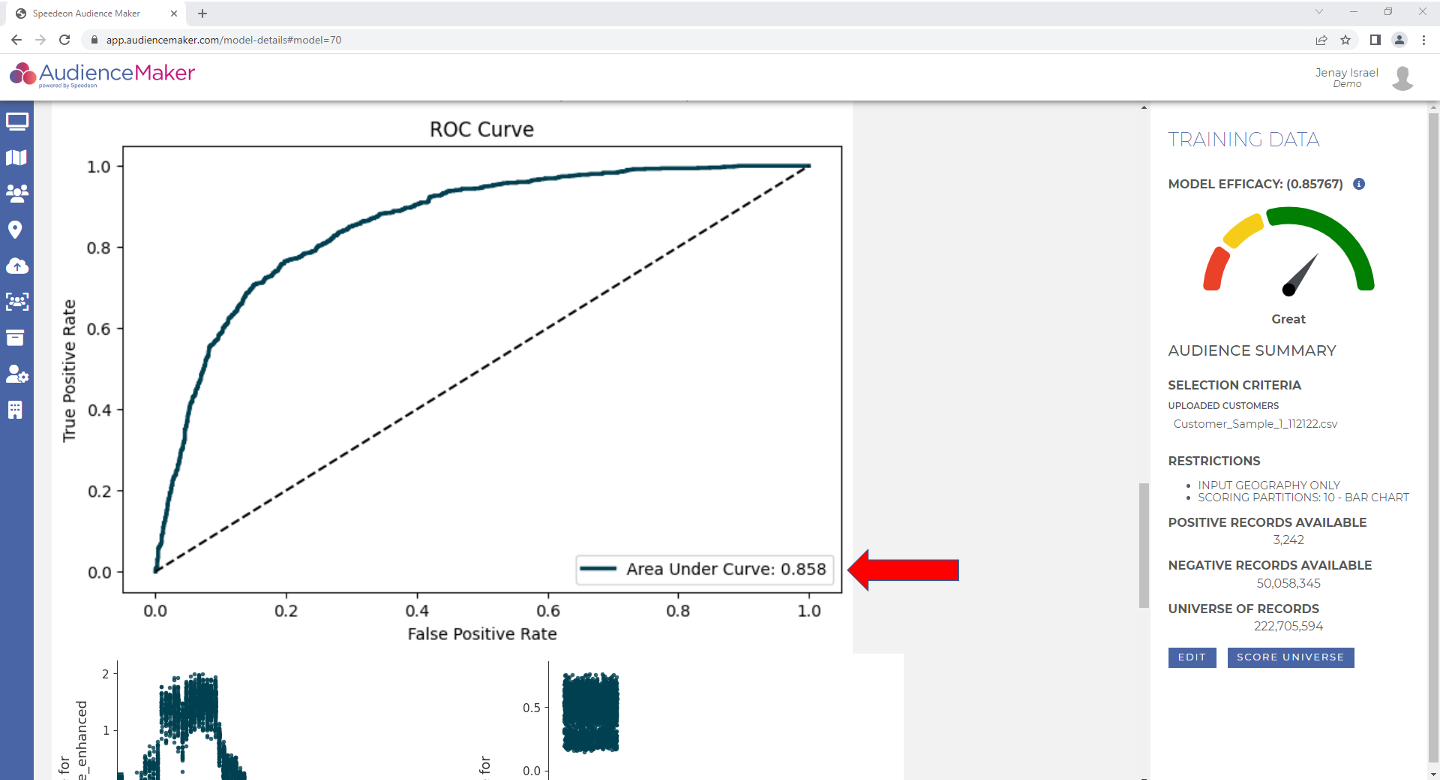
‘ROC Curve’ – This plot ROC stands for “receiver operating characteristic”. The curve plots the true positive rate and the false positive rate OR more simply the model’s ability to differentiate the target from the non-target. As mentioned above, higher Area Under Curves (the area under the ROC curve) represents the model’s ability to predict positive records more accurately. Typically, Area Under Curves of .60 – .95 indicate a “workable” model.
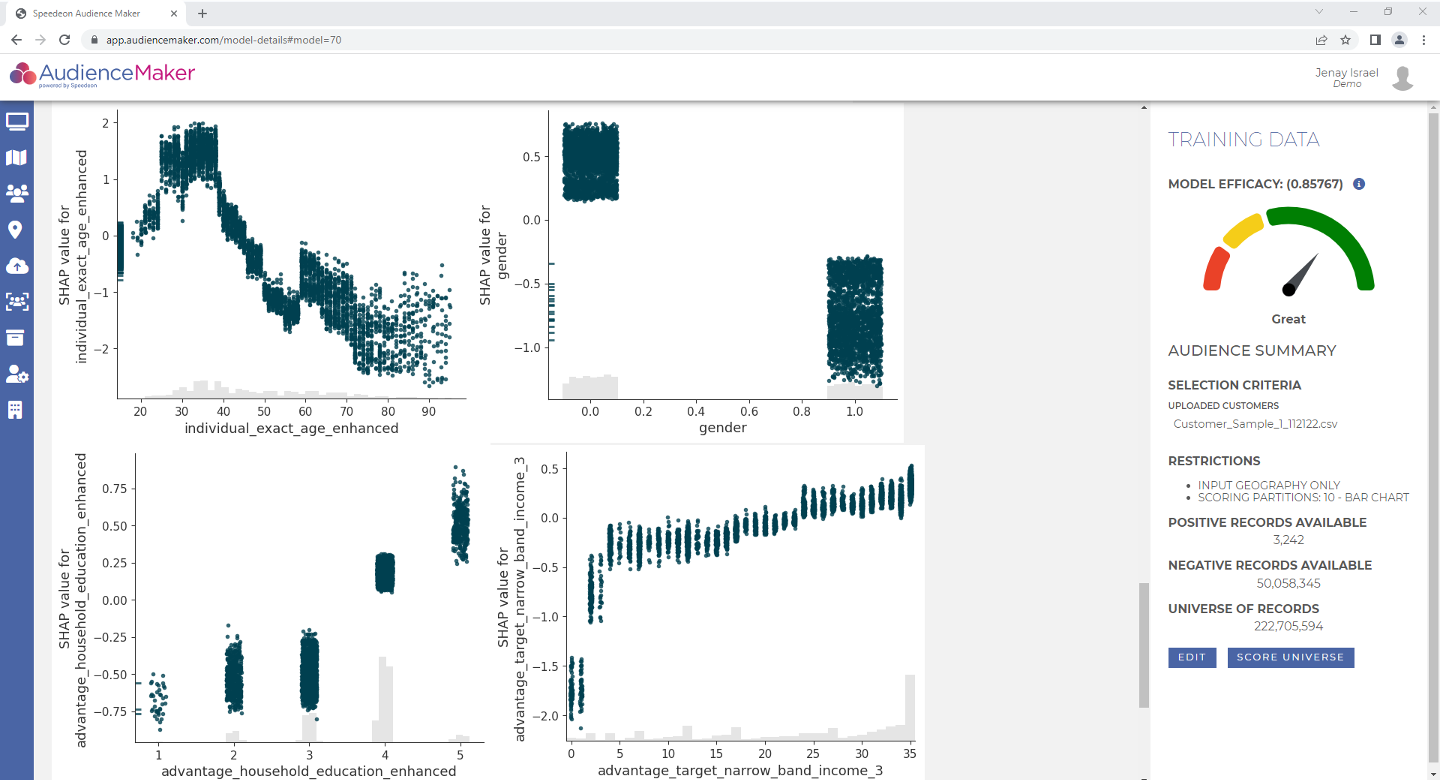
‘Shap Value’ Tables – For the five most important features in the model, Shap Value tables are included that plot the value each test record had for that attribute in the model. For this chart, note anything that is positive has a favorable impact on the model and anything that is negative (below 0) has an unfavorable impact on the model. As noted below, lower ages (below 40) have a favorable impact on the model. Ages above 40 are unfavorable with this model.
Step 2
Once you have reviewed model metrics, you may determine if you are going to score the model so that the model may be leveraged for activation and/or analysis of first-party and third-party audiences. In order to score the model, click the ‘SCORE UNIVERSE’ blue button in the lower right-hand portion of the page:
Note that most models are usually scored in ~1 hour 45 minutes.
Step 3
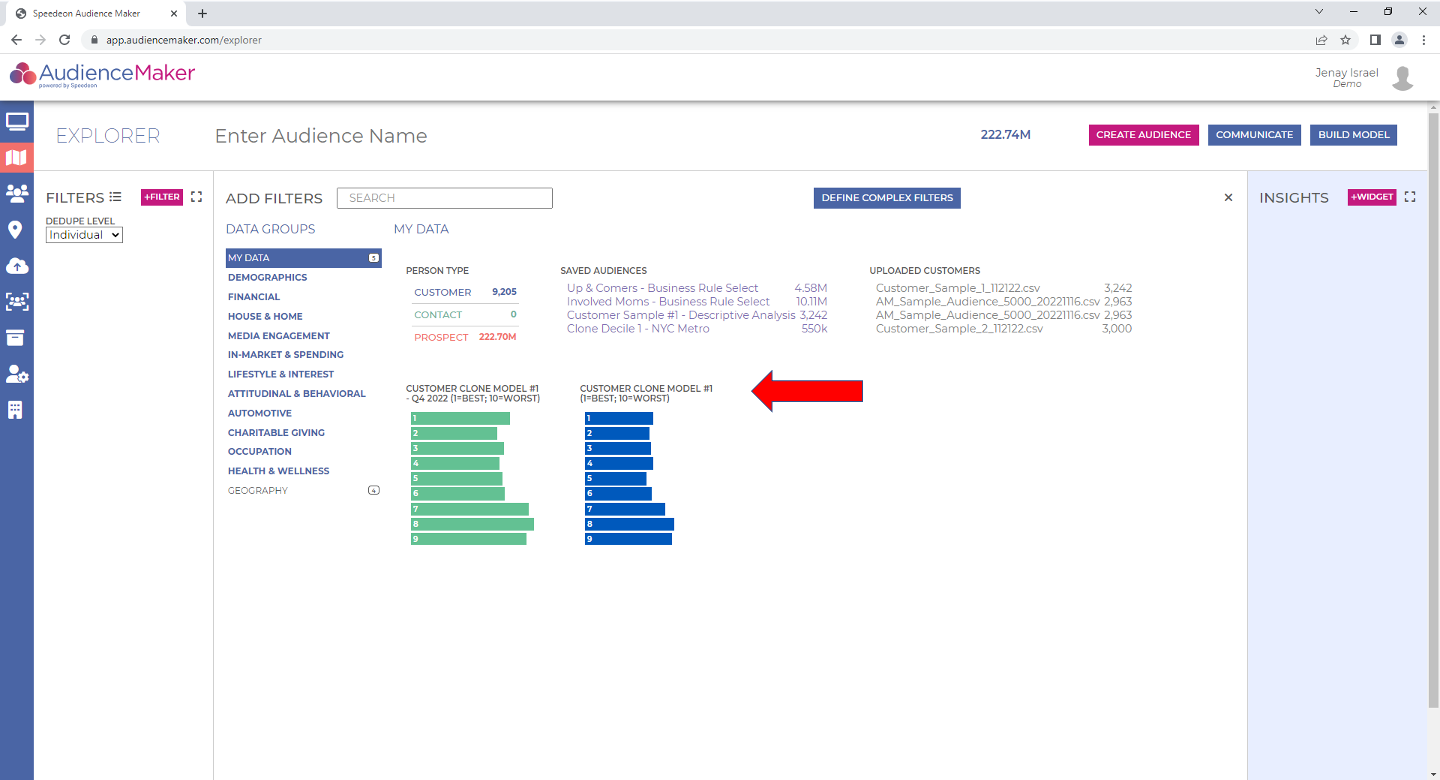
Once the model has been scored, a new attribute with the model’s name will appear in the ‘My Data’ data group in ‘EXPLORER’.